We know that
Teledermatology.ca is relatively new system to many users. How it works
is clearer to some users than others. With this section, we're hoping to demystify the
system and explain step-by-step what you should expect when using
Teledermatology.ca.
If you have any immediate concerns about how to use the site please
contact us - your
question may even get added to this section!
Table of Contents
1. Learning The Dashboard
2. Creating A New Consult
3. After Your Consult Is Submitted
4. When The Consult Has Been Completed
Learning The Dashboard
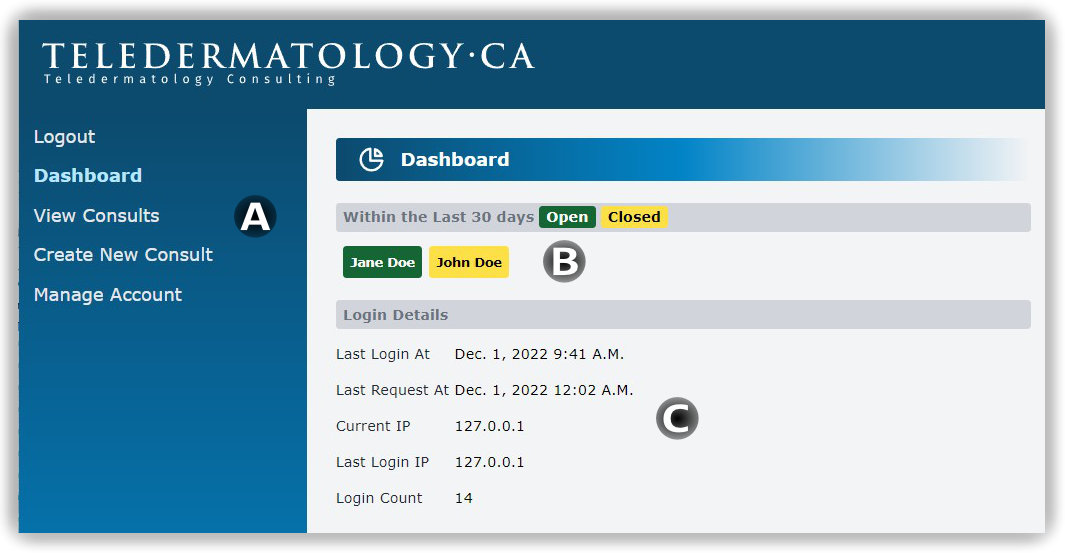
1.0 Learning The Dashboard
Once logged into Teledermatology.ca, you'll find yourself at the dashboard page.
This page provides with access to:
The main menu. Through these choices you can
view your consults, create a new consult
and review your account settings. Don't forget to "Logout" in the top right!
That status of all consults submitted in the last 30 days.
A technical overview of your login.
Creating A New Consult
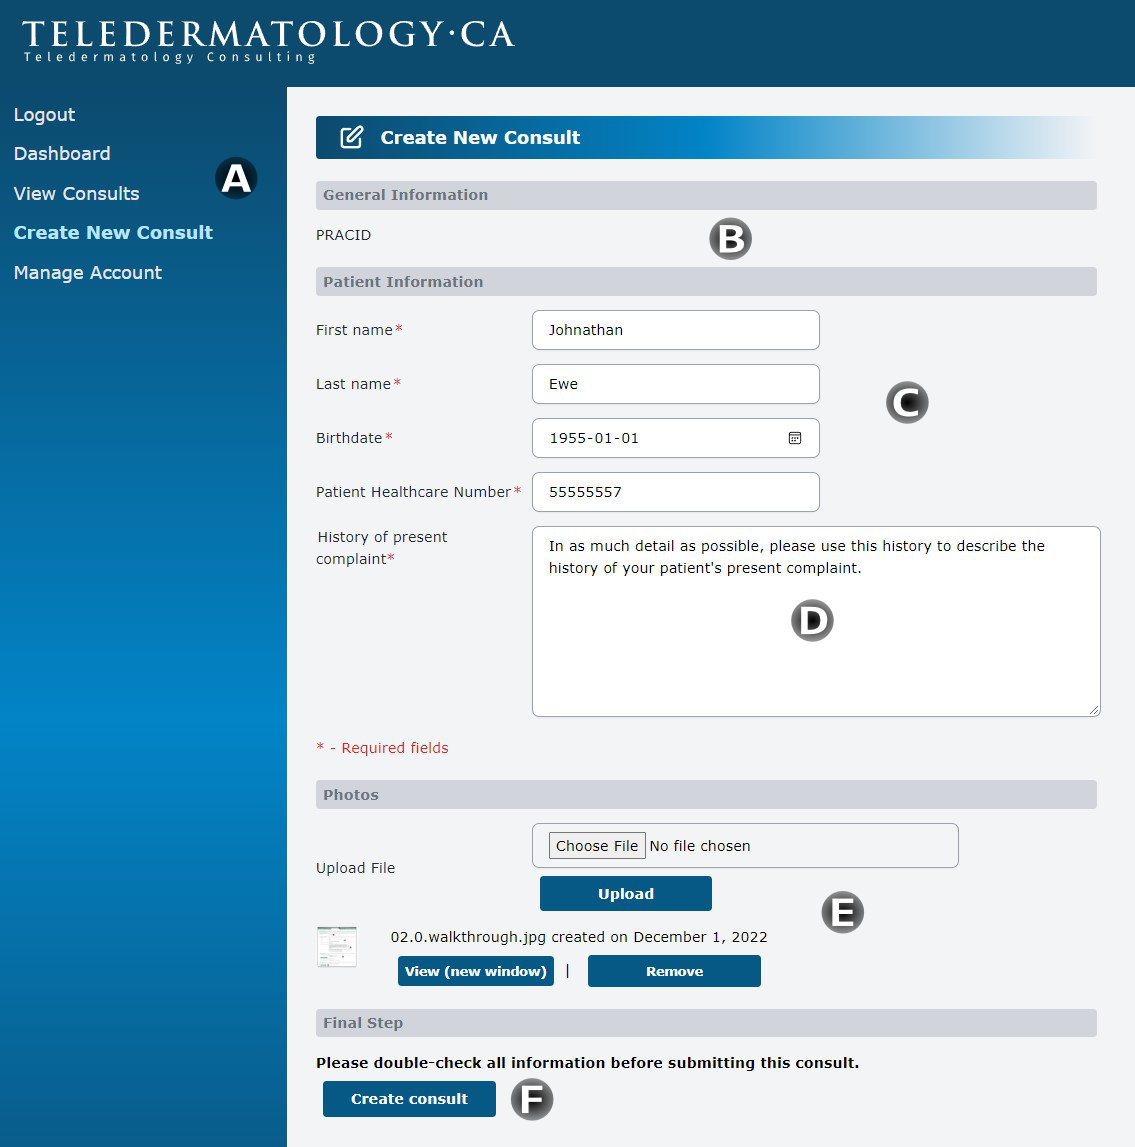
2.0 Creating A New Consult
The is an overview of the data you're required to enter for your consult:
Make sure you have chosen the correct menu item.
If you are a doctor, your PRACID from your registration is
automatically assigned
to the consult.
If you are a patient, this section will NOT display.
All required patient data including their name, DOB, and
health care number are required to be entered. If you are a patient,
your first and last name are pre-populated. You will need to enter
your DOB and health care number.
In the History of present complaint field, enter as much detail
as
possible about your patients current condition. This information
combined with the your photos will be used to produce the impression
and notes for your patient!
This is the area you'll use to attach photos to your consult. In
the
next step this will be covered in more detail.
Click this button to submit your consult for review.
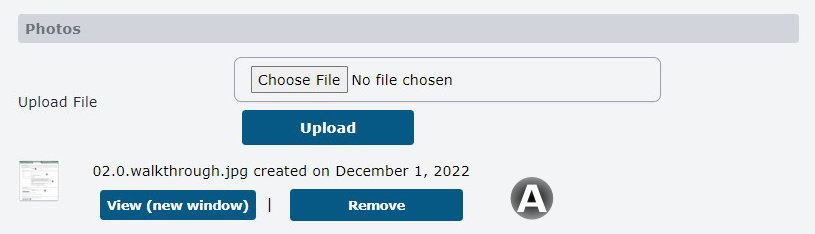
2.1 Attaching Images To Your Consult
Attaching images is a simple but multi-step process.
Use this field to select your first photo attach. The button to select your
file should say "Choose File", but may say "Browse..." or
"File".
Once you have selected a file, click "Upload" to begin uploading
to our server.
Upload time depends on your internet connection speed.
2.2 Uploading More Attachments
Once your image has uploaded, you will see:
A list of all uploaded images that will be attached to this consult.
Repeat step 2.1 for each image you want to upload.
2.3 Submitting Your Consult
Once your image has uploaded, you will see:
A list of all uploaded images that will be attached to this
consult.
Once you have finished entering the data and photos, click the Create
consult button.
After Your Consult Is Submitted
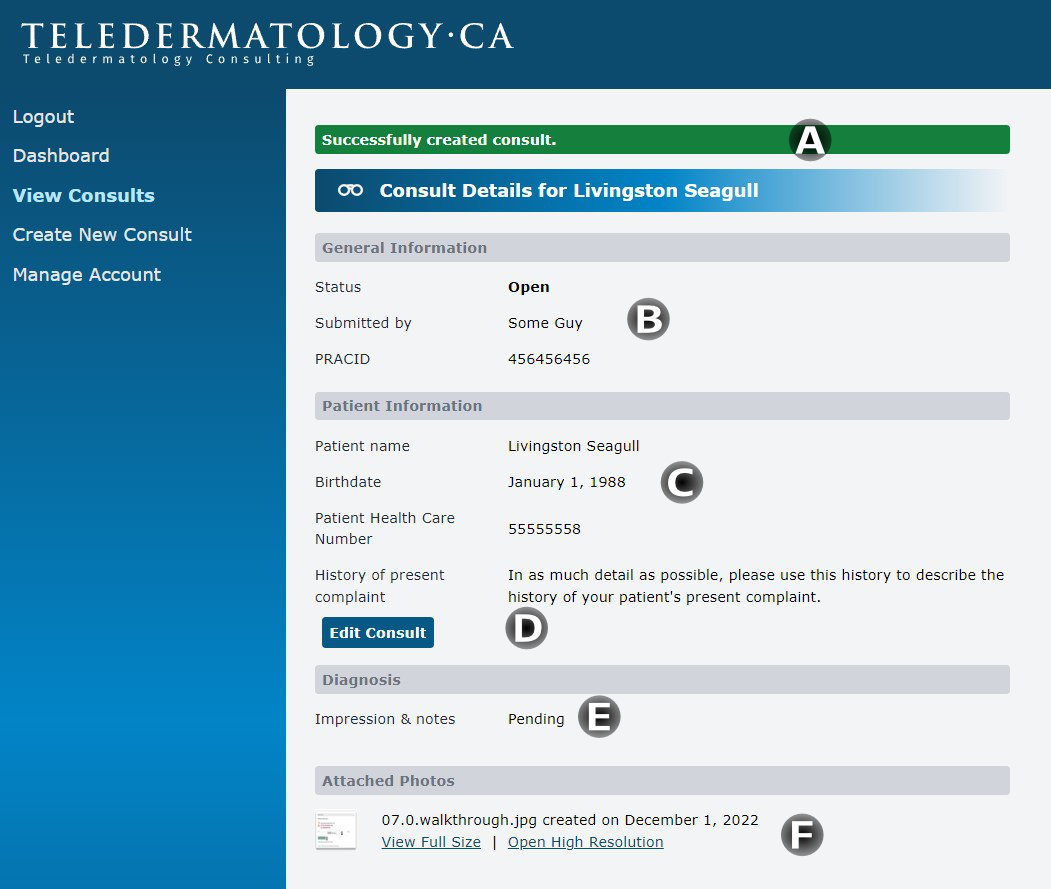
3.0 After Your Consult Is Submitted (Open Consult)
Once your consult has been submitted you'll be redirected to your consults overview
page.
A one time confirmation message indicating that your consult was successfully created.
Above your name and PRACID, you'll find the status of your
consult.
After creating a consult the status is always open.
This is the history of present complaint. As long as the consult
is open you can edit this data by clicking Edit Consult.
When the consult is closed, the impression & notes from
Dr. Alanen will be found here.
All the images attached to the consult can be reviewed here.
3.1 Back To The Dashboard
Once a consult has been submitted:
Select the Dashboard tab.
Notice that the consult you just created is now listed on the dashboard
as an open consult. Click the patient name to view the consult.
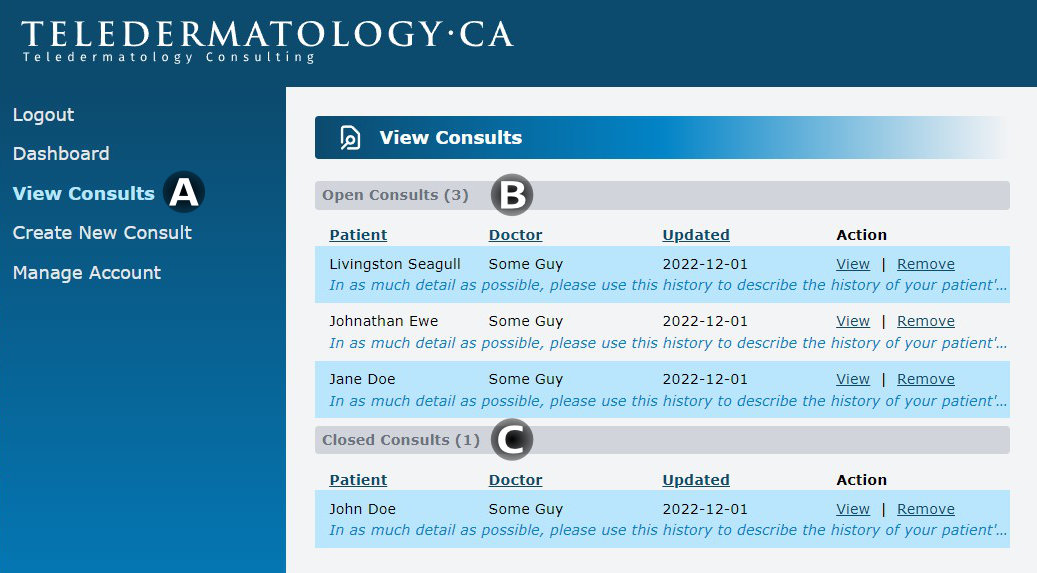
3.2 Using View Consults
You can review all open and closed consults from the 'View Consults' tab:
Select the View Consults if you are not already in this section.
The top section lists any open consults that you have. Click View to view the consult.
This section list your closed consults. Click View to to view
the consult.
When The Consult Has Been Completed
4.0 When The Consult Has Been Completed (Closed Consult)
Once the consult has been closed by Dr. Alanen, the completed consult
including
impressions and notes will be automatically faxed to your office. You will also receive an
email notification that the consult has been closed. This is what you will see after a
consult has been closed.
This shows the fax number the completed consult was sent to and the
email address the
notification was sent to.
You also are provided the ability to re-send the fax and
notification email or view it in your web browser.
Notice that status is now Closed.
Here you will find the impression and notes provided by Dr.
Alanen. They've been
obscured in this instance for confidentiality.